

Other Instructions:
Photo Guide Creation Instructions
Font Guide Creation Instructions
FAQ

Instructions for Printing Text on a Printer
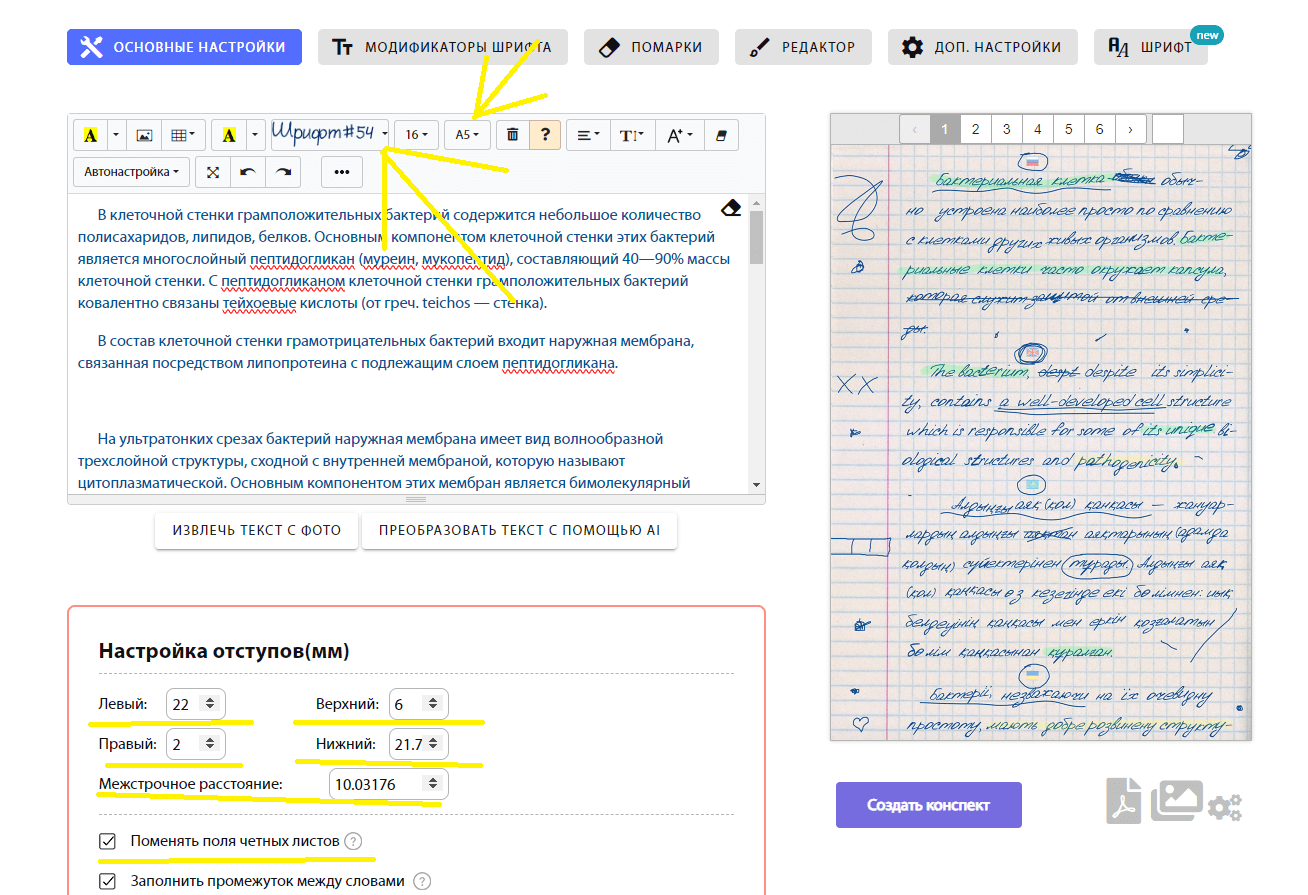
How does it work?
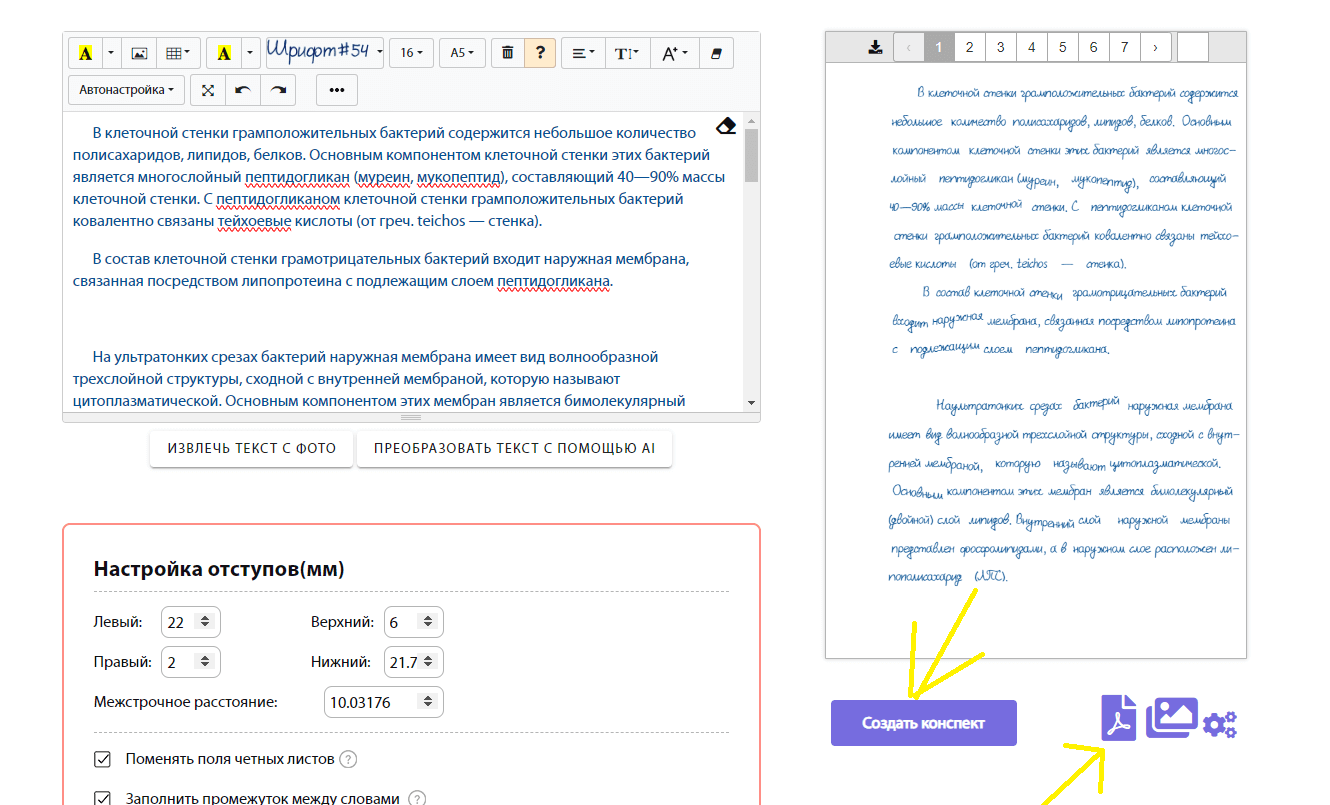
Tired of writing notes? Our service will save you from it! You can convert any text typed on the keyboard or from the internet into a scan or photo of your notebook, and show it in distance (or other) learning. Everything is already set for you, just choose a background (if needed, 16 available) and font (if needed, 54 available), insert the text and click "Create notes", then you can download the notes as a photo or pdf.
More detailed settings can be found by clicking on the "question mark" next to the setting.
If it doesn't work out, you can always print the notes in your notebook imitating handwriting. Open it and print either through the browser or through a program (e.g., Adobe Acrobat Reader DC). How to print correctly is described below!
You need to set the correct top margin (see below for how to do it)

3. Print settings
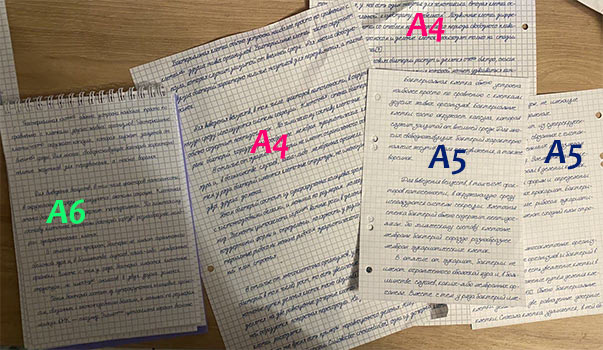
Choose your sheet format in auto settings or create your own
A4 block sheet | A5 block sheet | A5 notebook with spring (Non-standard format) | A6 notebook with spring
This is the standard A4 format, supported by all printers. Block sheets may have different top margins (the first cell is cropped differently). To print accurately within the cell, you need to specify the correct margin. More details
This is the standard A5 paper format, supported by most printers. Block sheets may have different top margins (the first cell is cropped differently). To print accurately within the cell, you need to specify the correct margin. More details
This is the standard A6 paper format, supported by most printers.
Non-standard format
Before printing in the notebook, you need to create your own carefully bend the spring and pull out the sheets.
To create a non-standard paper format, measure the sheet with a ruler:
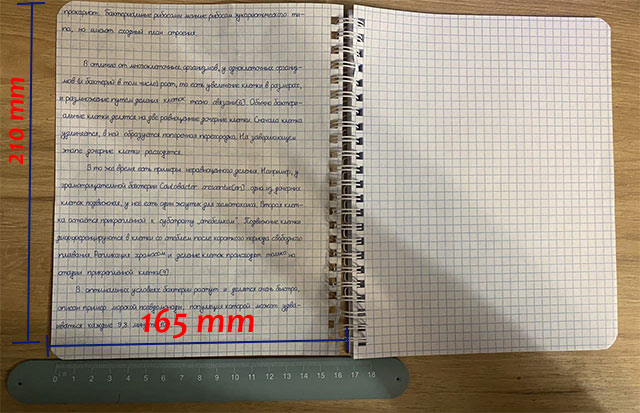
Click on "Create" here. Switch to millimeters:
Width: 165 mm
Height: 210 mm
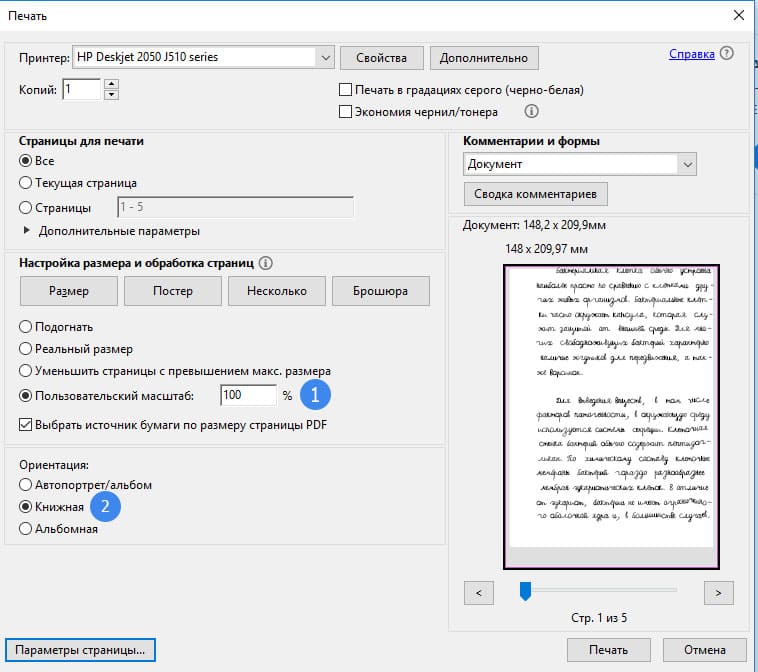
After creating the format for the printer, you need to put a checkmark on "Choose the paper source according to the size of the PDF page" and "Real size":
Check the boxes for paper source and actual size.
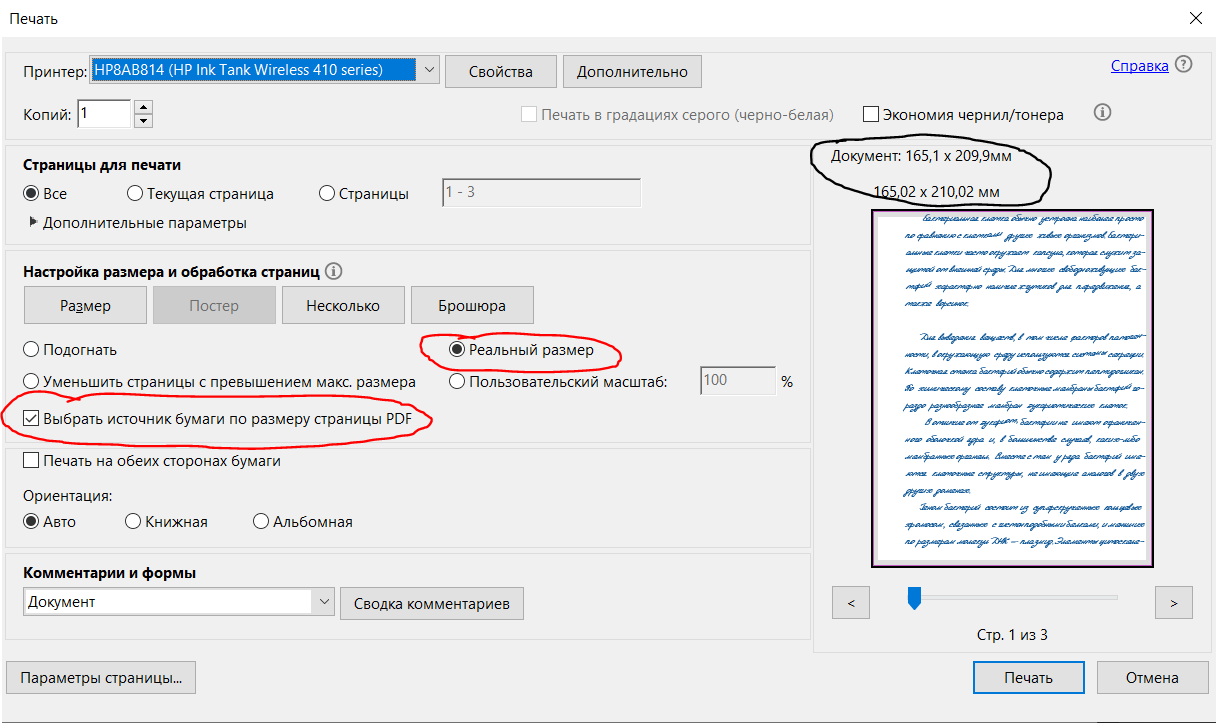
If you created the format correctly, the numbers above the notes (marked in black) will be the same. In our case, it's 165x210mm (the format of the created PDF document and the format supported by the printer). (format created in the PDF document and supported by the printer.).
You need to specify it correctly so that everything prints evenly in the cell. Calculated as: Margin from the beginning of the notebook to the end of the first cell where the text will start MINUS 6.5 mm. The margin may vary for all sheets (even if the sheets are from the same pack). It is often the case that the margins alternate. For example, the first sheet has a margin of 8 mm, the second - 5 mm, the third - 8 mm, the fourth - 5 mm... If you specify the margin incorrectly, all the lines will shift during printing.
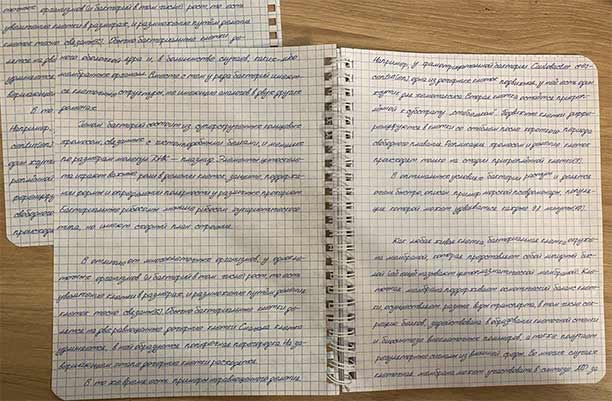
Example of error with different top margins:
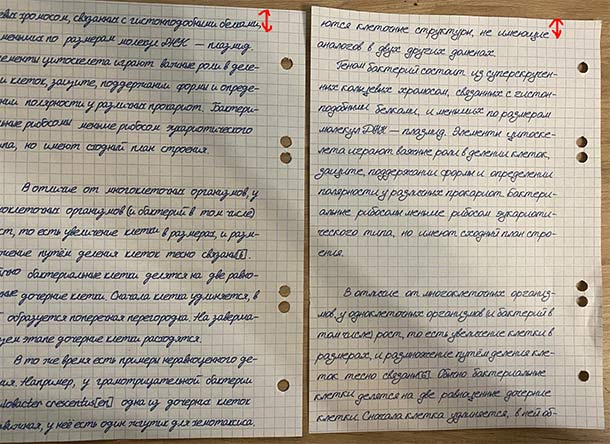
Here are two sheets from the same block with different top margins. As you can see, with the wrong top margin specified (left sheet), the lines do not fit into the grid.
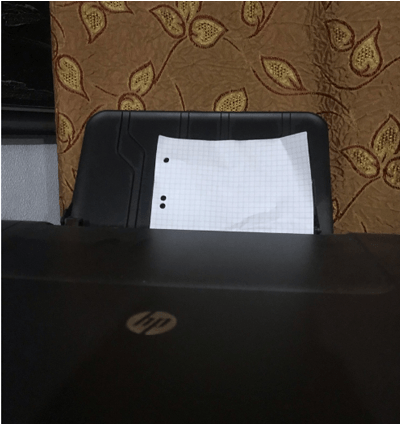
Left and right margins (depending on the sheet number) should not both be 0 because all notebooks have either margins or holes. The bottom margin may need to be incomplete because the sheet may be larger than the printer can print (as in the photo)
It is better to specify a spacing of not 10 mm, but from 10.01176 to 10.07176 mm (cell or line length + width of the drawn cell or line). The breakdown of values depends on the width of the drawn line of cells.
Example with the wrong distance specified:
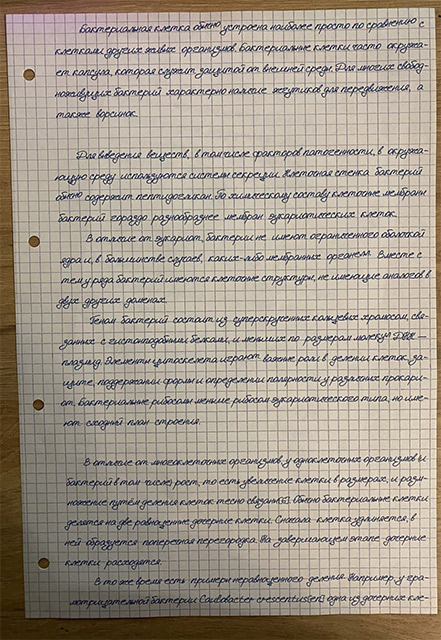
Here, I specified the margin as 10.07176, but it should have been 10.01176. As you can see, closer to the middle, it became noticeable that the lines shifted below the cells.
Makes fields "mirrored" on each page. A mandatory function for printing in a notebook, because when you turn the pages in the notebook, the holes for the block or for the spiral (spring) can be on the left or right (depending on the sheet).
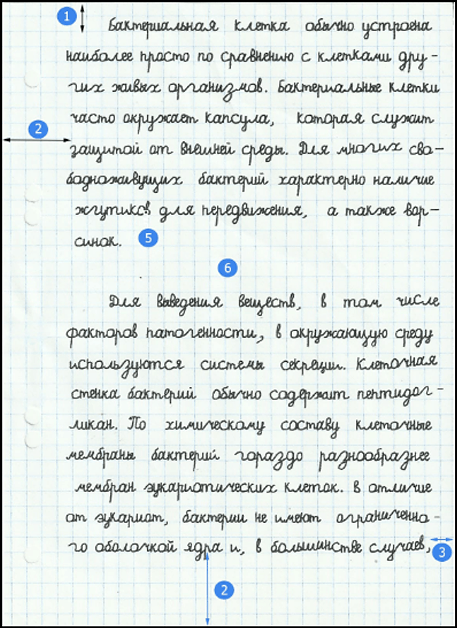
In the text input field, each paragraph is the beginning of a line (the end of a paragraph is marked with number 5). After the paragraph comes an "indent"!!
If a line is skipped (empty) in the input field, a gap is added in its place!!
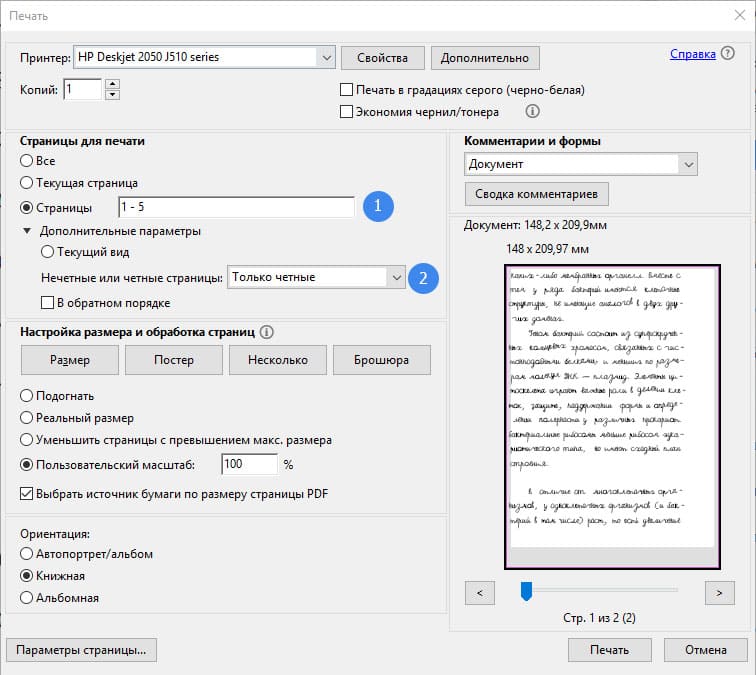
1. Set everything as shown:
Next, proceed to printing
The side where you measured the top margin, place it down. First print even pages. The holes for the block or for the spiral should be on the left
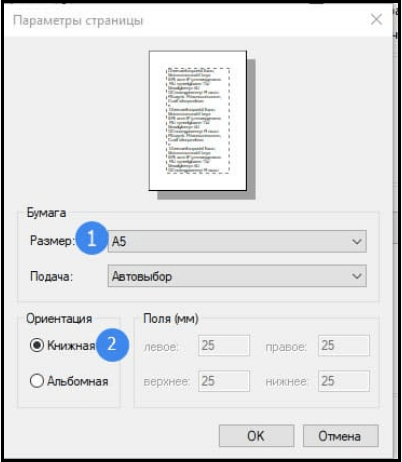
2. Click page settings:
Then take the printed pages, flip them over and print odd pages. Holes or margins should be on the right.
Your printer settings may vary. Also, the printer may not support some formats.